
Table of Contents
ToggleTackling a hoarder house isn’t your typical weekend deep clean. It’s a multi-day project that requires strategy, patience, and often a strong stomach. Whether you’re helping a family member, preparing an estate for sale, or dealing with a rental property that’s gotten out of control, the volume of accumulated items, potential biohazards, and underlying structural damage can be overwhelming. This guide walks through the practical steps to safely and systematically clean a hoarder house, from initial assessment to final restoration. Expect hard work, but with a clear plan, any space can be reclaimed.
Key Takeaways
- Cleaning a hoarder house requires thorough safety assessment before starting—check for structural damage, mold, pests, and biohazards, and always wear appropriate PPE including N95 respirators, gloves, and safety goggles.
- Budget for industrial-grade supplies including heavy-duty contractor bags, HEPA-filter shop vacuums, hospital-grade disinfectants, and a properly sized dumpster (10-20 yards minimum) to handle 4-8 tons of typical single-family waste.
- Clear entryways and hallways first to establish safe exit routes, then work systematically room-by-room from top to bottom, allowing 2-4 times longer than standard deep cleaning (8-12 hours per bedroom for a two-person team).
- Use a clear sorting system with defined categories—trash, recycle, donate, and keep—to prevent decision-making fatigue and reduce handling of items during a hoarder house cleanup.
- Call professional biohazard remediation companies ($2,000-$10,000+) for sewage, extensive mold (over 10 square feet), remains, or hazardous materials; hire licensed contractors for structural, electrical, or plumbing work requiring permits.
- Deep cleaning after decluttering demands hospital-grade disinfectants, enzyme treatments for odor removal, HVAC system professional cleaning, and mold-killing primer on affected walls before painting to ensure complete restoration.
Understanding the Scope and Safety Concerns
Before anyone touches a single item, a thorough assessment is critical. Hoarding situations often hide structural damage, pest infestations, mold growth, and biohazards like human or animal waste. Walk through the property with a flashlight and notepad, documenting room conditions and identifying immediate hazards.
Check for sagging ceilings or floors, accumulated weight can exceed load-bearing capacity, especially on upper floors. Look for signs of water damage, active leaks, or compromised electrical outlets buried under debris. If you spot extensive mold, rodent droppings, or sewage contamination, stop and consult a professional remediation company before proceeding.
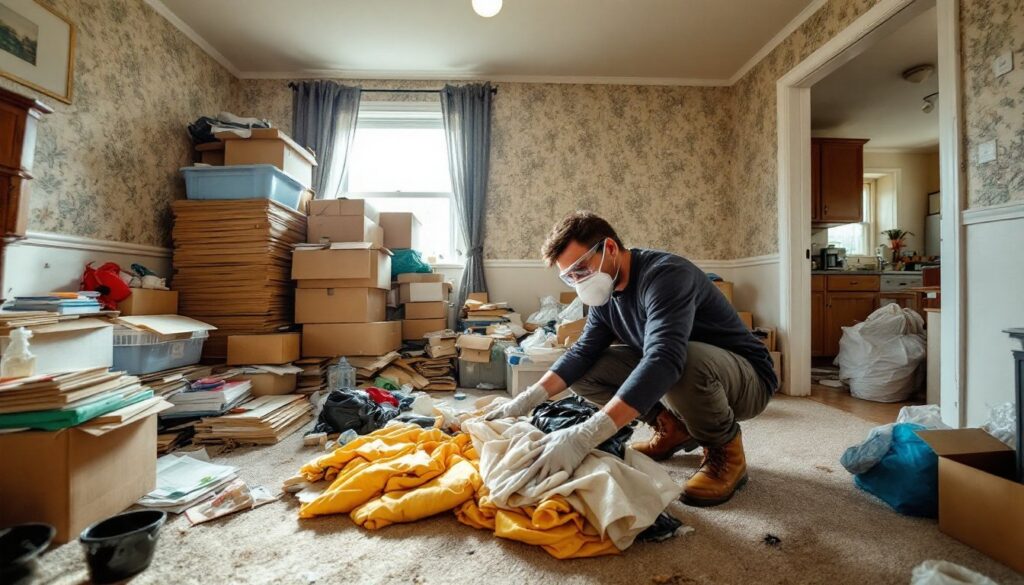
Personal protective equipment (PPE) is non-negotiable. At minimum, wear N95 respirators (not surgical masks), heavy-duty gloves, long sleeves, long pants, and closed-toe boots. Safety goggles protect against dust and debris when moving items. If there’s any suspicion of asbestos-containing materials (common in homes built before 1980), do not disturb insulation, flooring, or ceiling tiles without a certified inspector’s clearance.
Hoarding cleanups also intersect with mental health considerations. If the occupant is still living in the home, involve them in decision-making where possible and consider connecting them with a therapist specializing in hoarding disorder. Forcing a cleanout without support often leads to relapse or severe emotional distress.
Essential Supplies and Equipment You’ll Need
Hoarding cleanups demand industrial-grade supplies, not household cleaning products. Budget for bulk quantities and plan for multiple supply runs.
Materials list:
- Heavy-duty contractor bags (3-mil thickness minimum for trash, clear bags for sorting)
- N95 or P100 respirators (one per person per day)
- Nitrile gloves (buy boxes, not pairs, you’ll go through dozens)
- Safety goggles and work boots with puncture-resistant soles
- Headlamps or battery-powered work lights (power may be out or inaccessible)
- Push brooms, wide floor scrapers, and shop shovels
- Disinfectant concentrate (quaternary ammonium or hospital-grade cleaner)
- Enzyme cleaner (for organic stains and odors)
- Mold-killing primer (if wall surfaces show contamination)
- Plastic sheeting and duct tape (to seal off rooms during work)
- Dumpster rental (10-20 yard minimum, possibly multiple loads)
Tools you’ll need:
- Utility knife with extra blades
- Pry bar (for removing damaged baseboards or flooring)
- Shop vacuum with HEPA filter (standard vacuums can’t handle this debris)
- Extension cords and power strips
- Dolly or hand truck for heavy items
Don’t skimp on the dumpster size. Most first-timers underestimate volume by half. A moderately hoarded single-family home can generate 4-8 tons of waste.
Creating a Strategic Room-by-Room Plan
Random cleanup attempts in hoarding situations waste time and energy. Start with a clear path to exits, then work systematically.
Begin with entryways and hallways, these become your primary routes for moving material out of the house. Clear enough width for safe passage with loaded bags (minimum 36 inches). Next, tackle the kitchen and bathrooms, as these areas often harbor the worst biohazards and pest activity. Addressing them early reduces health risks for the rest of the project.
Work from top to bottom and back to front within each room. Clear upper surfaces and shelves first, then mid-level furniture, then floors. This prevents re-contaminating cleaned areas with falling debris. In multi-story homes, start on the upper floor to avoid carrying material upstairs.
Set up designated zones outside or in a garage: one for items to keep, one for donations, one for recycling, and one for trash. Use different colored tarps or roped-off sections to prevent mixing. Having a well-organized system speeds decisions and reduces re-handling.
Expect each room to take 2-4 times longer than a standard deep clean. A heavily hoarded bedroom might require 8-12 hours of work for a two-person team. Don’t rush, hasty cleanup increases injury risk and misses hidden damage.
The Sorting System: Keep, Donate, Trash, and Recycle
Decision-making fatigue is real in hoarding cleanups. Set clear criteria upfront to avoid paralysis over every item.
Trash (immediate discard):
- Anything with mold, severe staining, or pest damage
- Expired food, medications, and cosmetics
- Broken items with no repair value
- Papers with no legal or financial significance
- Clothing or textiles with contamination
Recycle:
- Clean cardboard, paper, and magazines (check local guidelines, contaminated paper isn’t recyclable)
- Metal items and appliances (many scrap yards offer free pickup for large loads)
- E-waste like old computers, TVs, and phones (never trash these, find a certified e-waste recycler)
Donate:
- Gently used clothing, linens, and household goods
- Unopened, unexpired pantry items (food banks often accept these)
- Furniture and appliances in working condition
- Books, toys, and décor without damage
Most donation centers won’t accept items from hoarding situations due to contamination concerns. Call ahead. Habitat for Humanity ReStores sometimes take building materials and fixtures. When handling donations, practices borrowed from cleaning efficiency methods can help batch similar items together for faster drop-offs.
Keep:
- Legal documents (deeds, titles, birth certificates)
- Financial records (keep 7 years for tax purposes)
- Family photos and irreplaceable mementos
- Items with clear functional use in the household
Box and label anything in the “keep” category immediately. Don’t create a secondary pile that becomes its own problem.
Deep Cleaning and Restoration After Decluttering
Once rooms are cleared, the real cleaning begins. Hoarder houses often have layers of grime, odors embedded in surfaces, and damage that wasn’t visible under the clutter.
Start with dry work: sweep and scrape floors, remove damaged drywall or baseboards, and pull up contaminated carpet or padding. Most carpet in hoarding situations is unsalvageable. Underlayment and subfloor often need replacement if urine or other liquids have soaked through. Check for soft spots in flooring, this indicates rot and requires repair before new flooring goes down.
Wall and ceiling cleaning requires hospital-grade disinfectant. Mix according to manufacturer directions (usually 2-4 ounces per gallon) and work in sections, allowing proper dwell time (typically 10 minutes). Walls with mold should be treated with a fungicidal wash, then primed with mold-killing primer like Zinsser Mold Killing Primer before painting. Professionals at The Spruce recommend testing a small area first, as some paints may need complete removal if contamination is severe.
Odor removal is a multi-step process. Enzyme cleaners break down organic compounds in carpet, subflooring, and grout. After enzymatic treatment, seal porous surfaces with an odor-blocking primer (oil-based products like Kilz Original work better than water-based for severe cases). Run an ozone generator only in unoccupied spaces, ozone is a respiratory irritant and requires a 24-hour clearance period after use.
HVAC system attention is mandatory. Replace all air filters, have ducts professionally cleaned, and sanitize return vents. Accumulated debris in ductwork spreads contamination throughout the house once the system runs.
Inspect and clean kitchen appliances if they’re salvageable. Refrigerators and ovens can often be saved with degreaser and disinfectant, but if there’s rust or mechanical failure, replacement is more cost-effective than repair. Guidance from Real Simple suggests checking seals and gaskets, as these often harbor mold and can’t be fully cleaned.
When to Call Professional Cleaning Services
Some hoarding situations exceed DIY capability, both legally and practically. Know when to hire specialists.
Call a professional biohazard remediation company if you encounter:
- Human or animal remains
- Sewage backup or flooding
- Extensive mold growth (covering more than 10 square feet per EPA guidelines)
- Sharps, drug paraphernalia, or other hazardous materials
- Chemical contamination or unknown substances
These companies have specialized training, equipment, and disposal permits that homeowners can’t access. Expect costs from $2,000-$10,000+ depending on severity and square footage. Most homeowners insurance doesn’t cover hoarding cleanup, but some policies include biohazard coverage, check before you pay out of pocket.
Licensed contractors should handle:
- Structural repairs (sagging floors, damaged joists, load-bearing wall issues)
- Major electrical work (buried outlets, chewed wiring, panel upgrades)
- Plumbing repairs beyond fixture replacement
- Mold remediation requiring containment and negative air pressure
If the property will be sold or rented, consider hiring a professional cleaning service specializing in extreme cleanouts for the final phase. They have commercial-grade equipment and can work faster than volunteers. Costs typically run $0.50-$2.00 per square foot for post-hoarding deep cleaning.
Permits aren’t usually required for cleaning itself, but structural, electrical, or plumbing work triggered by the cleanup will need permits per local building codes. Don’t skip this, unpermitted work can cause problems during property sales and create liability issues. Tips from Martha Stewart emphasize documenting all repairs and keeping receipts for restoration work, especially if the property is part of an estate.
Conclusion
Cleaning a hoarder house is one of the toughest projects a homeowner or property manager can face, but it’s achievable with the right approach. Safety comes first, never compromise on PPE or rush into situations with structural or biohazard concerns. Work systematically, set realistic timelines, and don’t hesitate to bring in professionals when conditions exceed safe DIY limits. The result is a reclaimed, livable space and often a significant improvement in property value and safety.